Clipping dan Headroom: Rahasia Bikin Mix Kamu Makin Hidup dan Dinamis!

Namanya terdengar seperti salon barbershop hipster… tapi pengetahuan dasar tentang keduanya bakal bikin hidupmu lebih mudah dan trek fotomu jauh lebih mantap!
Merekam dan mixing musik itu adalah kegiatan yang magis banget! Di sinilah kita mengubah ide-ide mentah menjadi versi terbaiknya. Tapi seseru apa pun mengubah sesi multitrack menjadi lagu yang bernyawa, ada beberapa aturan membosankan yang sebaiknya (hampir) tidak dilanggar. Untungnya, aturan ini justru bikin aktivitas studio jadi lebih mudah dan memicu kreativitas!
Hal yang paling membosankan tapi sangat berguna dari semua aturan itu adalah tentang clipping dan headroom. Dengan kata lain, apa yang terjadi ketika sinyal audio terlalu kuat… dan bagaimana cara kita mengendalikannya.
Clipping bisa menjadi duri yang mengganggu atau malah menjadi bumbu rahasia buat bikin hasil mixing-mu makin nge-pop, bisa jadi kesalahan pemutaran yang menyebalkan atau justru menjadi karakter suara ikonik yang mendefinisikan sebuah era. Sementara itu, headroom memberimu ruang ekstra untuk mengekspresikan diri dengan pemrosesan kreatif dan mixing yang asyik.
Artikel ini bakal membahas semua hal yang perlu kamu tahu, mulai dari headroom dalam perekaman digital, mixing, dan mastering, hingga penggunaan clipping yang membentuk karakter suara yang mendefinisikan genre musik.
Semuanya sangat mudah dipahami kok! Dan berbekal pengetahuan ini – plus analisis trek gratis dari Mix Check Studio – kamu siap merancang hasil mixing yang lebih kaya dan dinamis!
Clipping? Headroom? Apaan sih sebenarnya?
Biar gampang dipahami, clipping adalah apa yang terjadi pada bentuk gelombang (waveform) audio ketika kamu mendorong sinyal melalui jalur analog atau digital dengan level yang terlalu tinggi. Ini bakal mengubah suaranya. Kadang-kadang kita menginginkan ini, tapi kadang juga tidak.
Nah, bayangkan headroom sebagai ruang kosong yang kamu miliki untuk menaikkan level sinyal tanpa terjadinya clipping.
Untuk benar-benar memahami keduanya, yuk kita ingat-ingat lagi beberapa konsep dasarnya.
Untuk benar-benar memahami keduanya, yuk kita ingat-ingat lagi beberapa konsep dasarnya.
Bentuk Gelombang (Waveform) dan Peak
Semua suara merambat dalam bentuk gelombang. Dan semua sinyal audio – baik analog maupun digital – diekspresikan oleh bentuk gelombang yang sesuai.
Waveform (Bentuk Gelombang)
Berikut adalah bentuk gelombang untuk detik pertama dari lagu Digital Love milik Daft Punk.
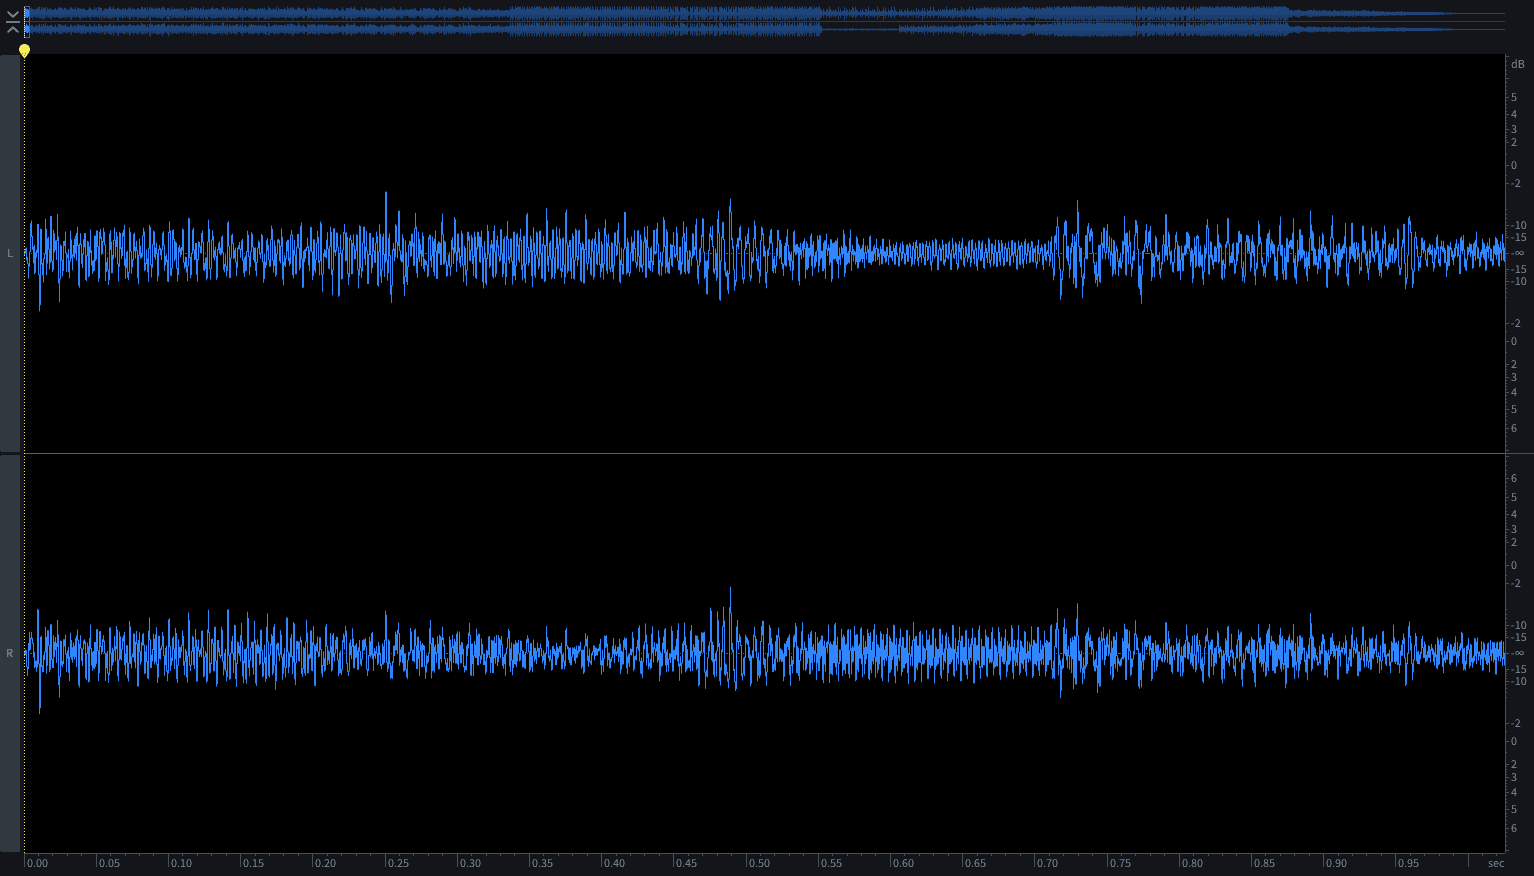
Bentuk dan kecepatan siklus dari gelombang tersebut menentukan nada dan timbre (yaitu bagaimana suara yang dihasilkan nantinya), sedangkan tingginya menentukan level atau volume dari suara tersebut.
Sekarang, coba bandingkan kedua gambar ini.
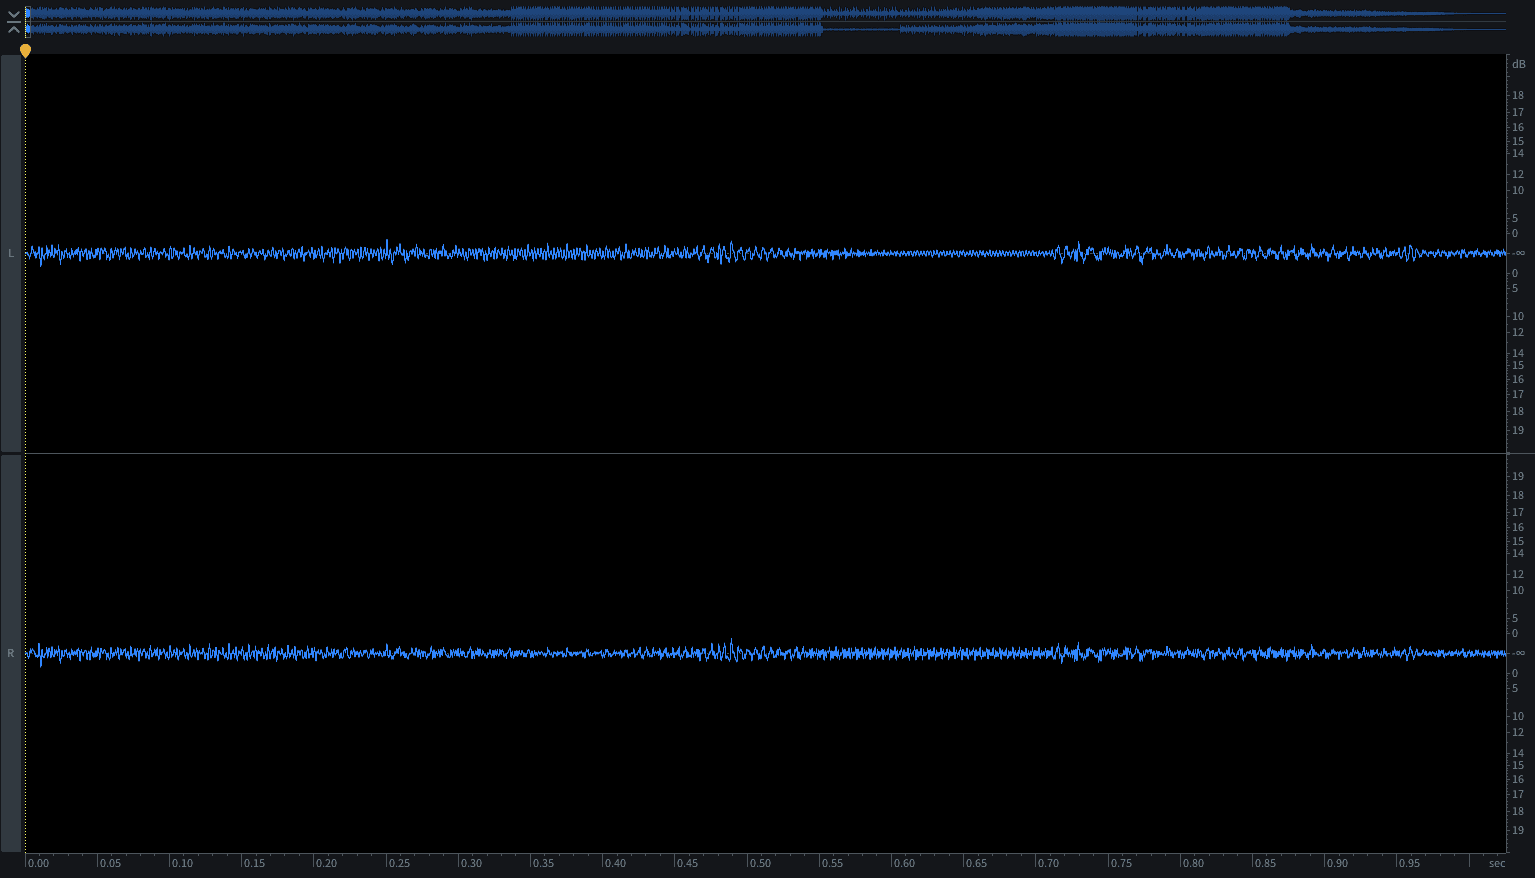

Tingginya berbeda tapi bentuknya sama, dan siklusnya berjalan dengan kecepatan yang sama, jadi suaranya akan tetap terdengar sama, meskipun yang pertama lebih pelan.
Seperti yang akan kita bahas nanti, bentuk dan tinggi gelombang ini sangat erat kaitannya dengan clipping.
Peak (Puncak)
'Peak' merujuk pada nilai tertinggi dari bentuk gelombang dalam rekaman/sinyal audio. Coba lihat file audio di bawah ini.
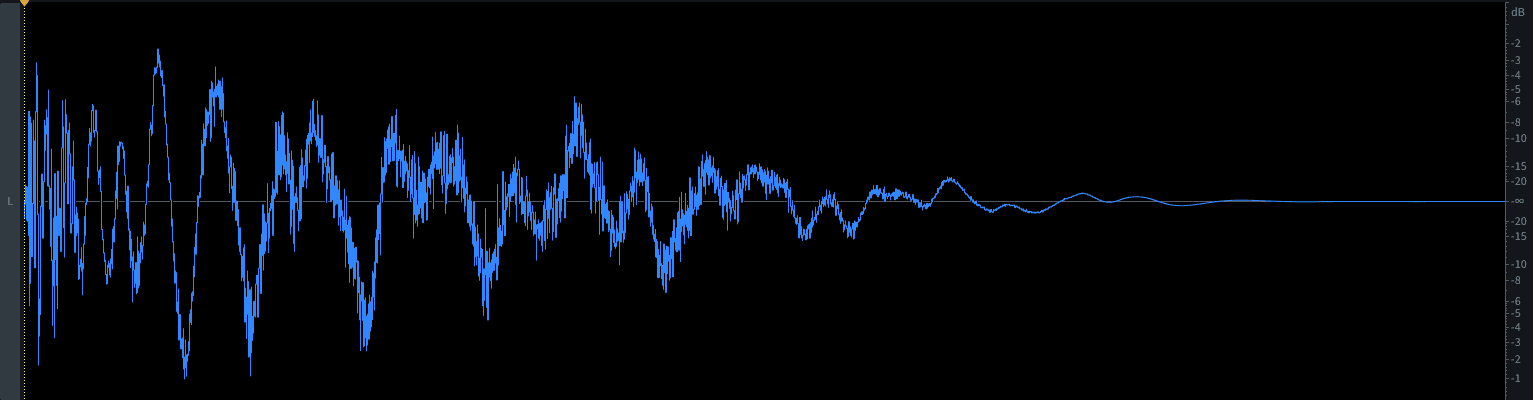
Peak adalah nilai tertinggi yang dicapai, dan dalam sistem audio digital diekspresikan sebagai nilai dBFS (lihat Panduan Sederhana tentang Kenyaringan dan Metering untuk info lebih lanjut tentang dBFS).
Peak untuk sampel kick drum di atas adalah -1dBFS (1dB di bawah 0dBFS).
Apa itu clipping?
Yuk, kita perluas definisi kita sebelumnya dengan pengetahuan baru tentang waveform ini!
Secara tepatnya, clipping terjadi ketika kekuatan sinyal (level) dari suatu audio melebihi kemampuan sistem untuk mempertahankan bentuk gelombang tersebut secara akurat.
Pada titik tertentu dalam sistem apa pun, menaikkan level sinyal akan mengubah bentuk gelombang dan akhirnya memengaruhi karakter suaranya.
Oleh karena itu, Peak adalah bagian tak terpisahkan dari clipping.
Clipping Analog vs Clipping Digital
Hal pertama yang wajib dipahami adalah perbedaan antara clipping pada tabung vacum (valve) dan sirkuit fisik asli, dengan clipping pada sistem digital.
Dalam sistem analog, gelombang suara yang mengalami clipping akan terkompres secara organik. Dynamic range-nya akan mengecil sehingga meningkatkan persepsi kenyaringan (lihat Panduan Sederhana tentang Kenyaringan dan Metering), tetapi distorsi analognya juga akan bertambah. Hasilnya, meskipun kurang ideal untuk mixing atau mastering yang bersih, sirkuit clipping analog sebenarnya adalah alat yang sering dipakai untuk menambahkan harmonik manis ke dalam sinyal suara.
Namun, sistem digital tidak menghasilkan efek kompresi organik ini secara alami. Tanpa adanya penanganan khusus, sistem digital hanya akan langsung memotong bagian atas gelombang suara, yang sering kali menghasilkan distorsi inharmonik yang sangat kasar dan tidak enak didengar saat diubah kembali menjadi suara.
Oleh karena itu, sistem digital sering kali menggunakan algoritma proteksi untuk mencegah gangguan audio yang mengganggu tersebut. Namun, bahkan dalam performa terbaiknya pun, sistem ini dirancang untuk sekadar se-transparan mungkin. Jika didorong terlalu ekstrem, suaranya akan pecah dengan cara yang tidak musikal, alih-alih menghasilkan harmonik yang enak didengar atau kompresi yang mulus. Jadi, biasanya tidak ada untungnya (no pun intended!) membuat sistem digitalmu mengalami overload.
Apa yang terjadi pada suara audio yang mengalami clipping?
Clipping bisa memberikan berbagai macam efek pada sinyal audio kamu.
Contoh efeknya antara lain:
– hilangnya frekuensi bass
– distorsi/saturasi
– transient yang rusak
– suara kresek-kresek, klik, dan distorsi inharmonik yang kasar (pada sistem digital)
– dynamic range yang berkurang
– pembulatan transient yang halus
Beberapa di antaranya ada yang positif, ada yang negatif, dan ada juga yang bisa jadi keduanya tergantung konteksnya!
Bad clipping – hal-hal yang wajib kamu hindari!
Saat kita membicarakan clipping, biasanya kita merujuk pada sesuatu yang terjadi di tahap input suatu perangkat.
Clipping pada tahap konverter Analog-ke-digital (ADC) bisa terasa sangat merusak. Batas keras 0dBFS itu berarti tanpa adanya algoritma proteksi, clipping tidak akan terdengar seperti distorsi harmonis yang kreatif, melainkan seperti iblis yang menyemprotkan jet washer langsung ke dalam gendang telingamu! Dan meskipun memakai algoritma proteksi, kamu akan kehilangan detail suara, merusak transient, dan berisiko menghasilkan distorsi inharmonik yang tidak sedap.
Membuat channel mixer DAW-mu overload biasanya hanya akan memicu algoritma proteksi internal, dengan hasil rusaknya suara seperti di atas. (Bahkan mixer analog paling murah sekalipun tidak akan terdengar bagus jika mengalami distorsi yang buruk).
Plugin sangat rentan terhadap bad clipping, terutama karena sangat mudah bagi kita untuk tidak menyadari hal ini terjadi saat menjalankan beberapa plugin secara berurutan – masing-masing plugin bisa memicu fitur anti-clipping (atau malah memicu clipping itu sendiri).
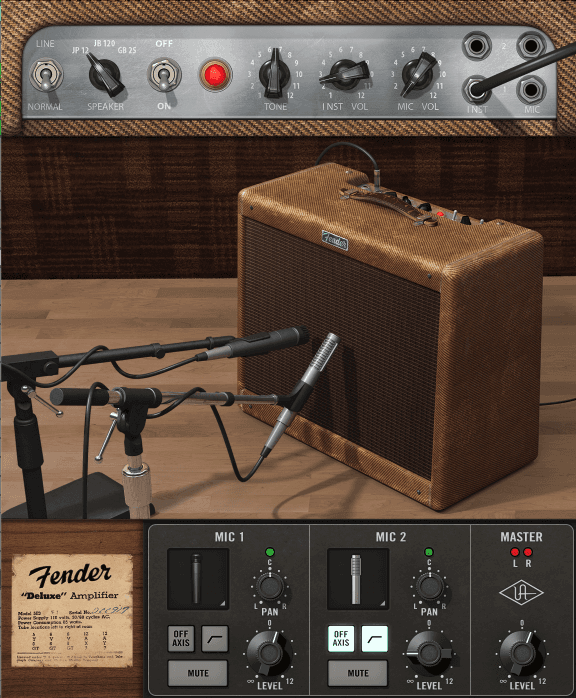
Perangkat analog pun tidak kebal terhadap sabetan bad clipping. Memang distorsinya bisa terdengar sangat asyik, terutama lewat preamp dan tabung kualitas tinggi. Tapi meskipun rekamannya terdengar bagus saat itu, ini adalah jalan satu arah yang tidak bisa diubah lagi. Kamu bisa merekam dengan clean dulu lalu menambahkan clipping analog nanti dengan presisi dan kontrol penuh. Tapi kalau sudah terlanjur direkam pecah, efek itu tidak akan bisa kamu batalkan di kemudian hari.
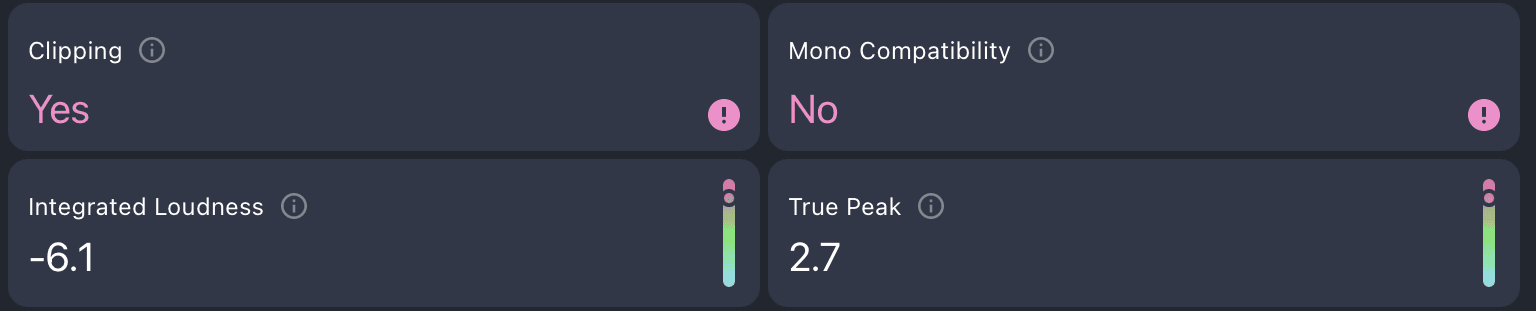
Terkait masalah clipping di tahap mixdown dan mastering, Mix Check Studio siap membantumu! Cukup unggah file master atau pre-master-mu, dan tools ini akan mendeteksi apakah terjadi clipping, lalu memberikan saran praktis untuk mengatasinya.

Nah, karena sebelumnya kita sudah sempat menyenggol soal creative clipping...
Kapan clipping itu terasa keren?
Boleh dibilang, bad clipping adalah jenis clipping yang tidak direncanakan dan menimbulkan masalah yang tidak bisa kita perbaiki. Tapi bagaimana kalau kita memang sengaja menginginkannya?
Dalam sistem analog, clipping justru bisa memberikan efek yang manis banget. Analog tidak memiliki batas keras 0dBFS. Peak suara tidak langsung dipangkas habis atau dibuat flat secara paksa, melainkan diratakan secara bertahap. Dan seperti yang sudah kita pelajari, hal ini mengubah karakter suaranya menjadi lebih kaya.
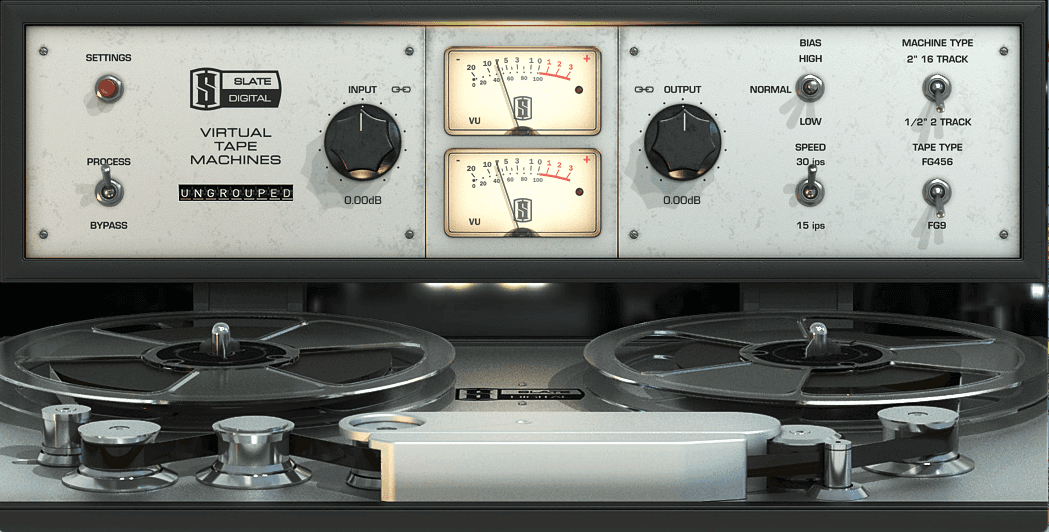
Jika dilakukan dengan tipis-tipis, khususnya melalui tabung audio atau pita tape, efek ini akan memberikan kehangatan yang lembut atau biasa kita sebut sebagai saturasi.
Dorong lebih kuat lagi, dan sinyal akan mulai mengalami clipping yang menghasilkan distorsi. Contohnya, dengan menaikkan level sinyal dari gitar elektrik sebelum masuk ke ampli, kita berhasil menciptakan distorsi merdu yang legendaris di jutaan solo gitar dunia!
Dan ini tidak hanya berlaku untuk gitar saja, lho! Clipping dalam bentuk overdrive/distorsi ini bisa menambahkan karakter pada vokal, synth, drum… apa saja! Dan dengan menduplikasi sinyal lalu mendistorsi salah satu salinannya saja, kamu bisa mempertahankan dinamika asli yang lebar sekaligus menikmati karakter suara yang asyik dari sinyal yang mengalami clipping tersebut.
Karakter suara dari distorsi ini bervariasi tergantung pada perangkat yang digunakan, tapi biasanya bersifat harmonis, alias selaras dengan frekuensi audio aslinya. Dan saat ini ada banyak plugin software yang dirancang khusus untuk menyimulasikan perilaku clipping bergaya analog ini.
Dalam proses mastering dan pengolahan drum pun, clipping bisa menjadi senjata yang ampuh. Apa yang disebut sebagai soft clipping adalah contoh nyatanya. Soft clipping bekerja dengan mulai menurunkan (mengurangi) sinyal lebih awal sebelum puncak tertinggi tercapai, yang sangat berguna untuk memperhalus transient.
Soft clipping juga bisa ditemukan pada beberapa limiter, yang diterapkan sebelum bagian pembatasan utama (master limiting), sehingga menghasilkan suara yang lebih mulus dibandingkan hanya menggunakan brickwall limiter saja (pantau terus artikel kami yang akan datang: Membongkar Rahasia Dynamic Range!).
Kenapa headroom itu penting banget?
Kembali lagi ke soal bad clipping, kunci utama untuk menghindarinya adalah dengan mengelola headroom kita. Dan membahas headroom adalah tentang hubungan antara audio kita dengan batas langit-langit (ceiling).
Ceiling dalam sistem audio digital kita adalah 0dBFS, yaitu titik batas di mana sinyal tidak boleh melewatinya. Kita terus-menerus memanipulasi sinyal dengan berbagai cara, dan semua yang kita lakukan pada sinyal tersebut berpotensi mengubah level sinyal dan memengaruhi puncak lagunya (peak).
Oleh karena itu, menyisakan headroom yang cukup adalah hal yang wajib hukumnya!
Dunia ini adalah panggung gain staging
Cara paling sederhana untuk mengontrol headroom adalah dengan tidak menambahkan terlalu banyak gain pada tahap input-mu. Atau, jika sinyalnya memang sudah terlampau keras, turunkan saja level inputnya.
Mengelola level sinyal di setiap tahap proses pembuatan lagu adalah hal yang sangat krusial, dan ini ada namanya: gain staging!
Perekaman, pemrosesan, dan mixing audio dilakukan melalui serangkaian tahapan, dan setiap proses baru – baik itu kompresi, EQ, emulasi pita tape, dll. – adalah tahapannya sendiri yang memiliki input dan output tersendiri pula. Gain staging adalah proses menyelaraskan gain secara terus-menerus agar sesuai dengan masing-masing tahapan tersebut.
Kebutuhan headroom ideal itu berbeda-beda. Ambil contoh saat merekam audio. Dalam sistem yang sepenuhnya digital, di mana tidak ada noise bawaan analog dan penurunan kualitas sinyal sangat minim pada level rendah, secara teknis kamu bisa menyisakan headroom sebesar 10dB atau bahkan 20dB tanpa merusak kualitas audionya.
Namun pada jalur analog, selalu ada sisa noise atau gangguan listrik lainnya seperti dengung atau desis. Jadi, sinyal yang terlalu pelan akan gampang tenggelam dalam noise tersebut. Jika kamu merekam audio dengan gain input yang kekecilan lalu menaikkannya belakangan, noise yang mengganggu dari jalur rekamanmu juga ikut naik, dan kadang ini bikin audionya jadi rusak dan tidak bisa dipakai. Hal ini sangat sering terjadi pada rekaman menggunakan pita tape atau preamp analog.
Bahkan di dalam DAW-mu pun, sebagian besar emulator pita tape dan rekreasi channel strip analog juga menyimulasikan noise ini. Sebagai contoh, jika kamu mengirimkan sinyal yang terlalu pelan dari virtual synth ke salah satu jenis plugin tersebut, lalu melakukan bounce pada channel tersebut (menjadikannya file audio baru dengan pemrosesan yang sudah menyatu), rasio noise terhadap synth tersebut akan ikut terekam paten di file audio baru itu.
Sebenarnya tidak ada aturan baku yang saklek, tetapi sebagai panduan praktis, sisakanlah setidaknya 6dB hingga 10dB headroom saat merekam ke dalam DAW kamu. Dan pada sistem analog, pastikan sinyalnya cukup kuat sehingga kamu tidak bisa mendengar suara desis atau noise tanpa harus memutar volume monitor dengan sangat keras.
Headroom dalam Mixing
Omong-omong, headroom bukan cuma penting untuk masing-masing track saja lho. Saat mixing, aturan yang sama juga berlaku. Jika kamu memulai mixing dengan menyetel level kick drum terlalu dekat dengan batas maksimalnya, bukan cuma keseluruhan trek yang akan membuat master bus kelebihan beban (overload) saat kamu menambahkan instrumen lainnya, tapi kamu juga tidak akan menyisakan headroom lagi untuk menaikkan volume kick tersebut nanti.
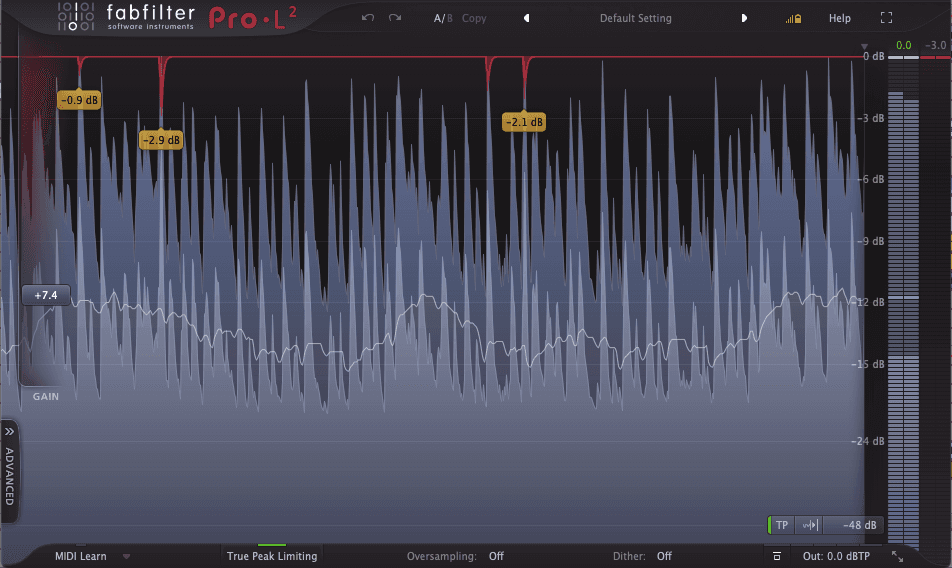
True Peak
Rasanya mustahil membahas clipping tanpa menyebut soal True Peak. True Peak adalah efek samping dari cara sistem digital menangkap suara. Berbeda dengan analog yang merepresentasikan gelombang suara asli dengan bentuk gelombang yang kontinu dan tanpa putus, dunia digital menangkap gelombang suara sebagai kumpulan potongan gambar (snapshot) yang cepat.
Coba lihat bentuk gelombang ini di Ableton Live.
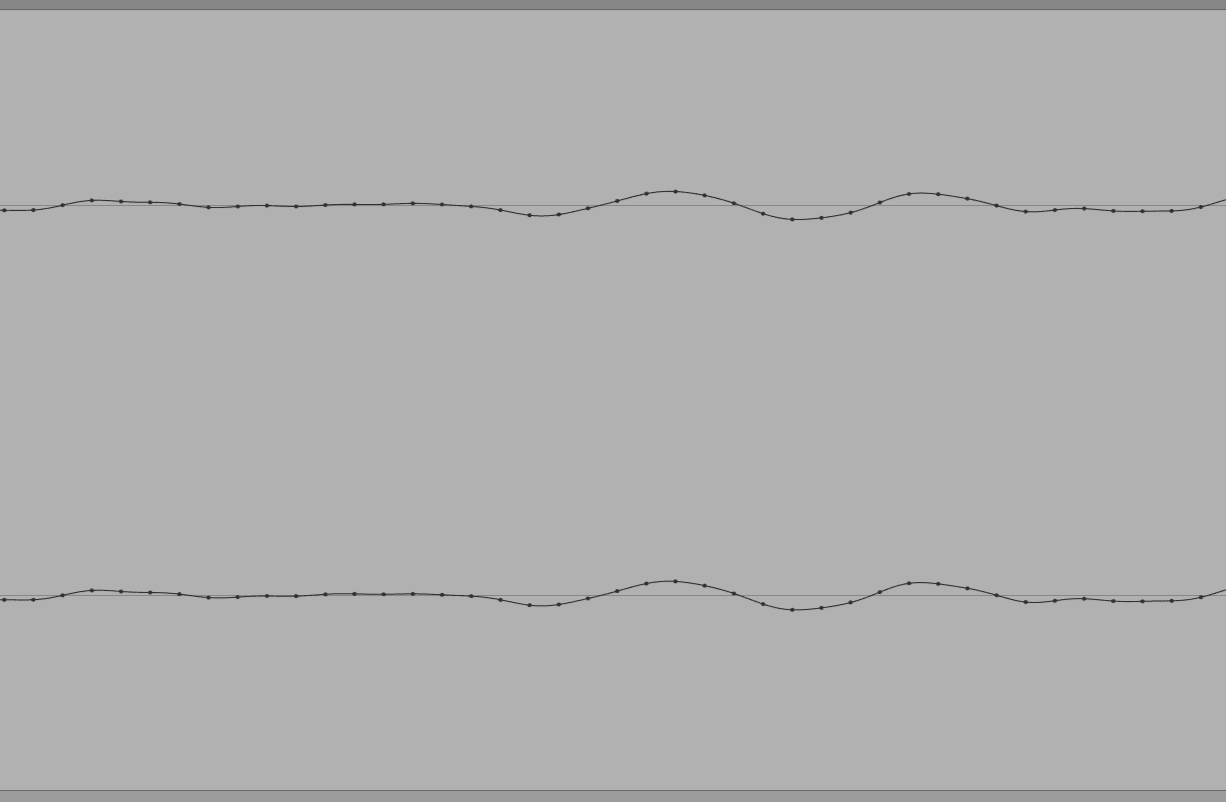
Setiap titik mewakili satu snapshot – itu adalah titik-titik pada grafik. Garis mulus yang terlihat di antara titik-titik tersebut sebenarnya tidak ada di audio digital – garis itu hanya menunjukkan apa yang akan kamu dapatkan ketika snapshot tersebut dikonversi kembali menjadi gelombang analog yang kontinu.
Jadi, ketika software memberi tahu kita nilai peak dari sebuah file audio, itu sebenarnya memberi tahu kita level tertinggi dari titik-titik pada grafik tersebut. Tetapi saat dikonversi kembali menjadi sinyal analog, konverter digital-ke-analog (DAC) harus menyambungkan kembali titik-titik tersebut. Dan biasanya itu tidak masalah. Namun, limiter brickwall digital modern mendorong sinyal jauh lebih keras lagi. Yuk kita lihat apa yang bisa terjadi.

Perhatikan dua sampel yang bersebelahan di posisi 0dBFS, tepat pada batas keras audio digital? Untuk mengubah ini menjadi suara, konverter digital-ke-analog harus menyempurnakan bentuk gelombang tersebut. Namun bentuk gelombang itu akan memunculkan puncak baru di antara kedua sampel tersebut. Sebuah puncak antar-sampel baru (inter-sample peak / ISP) akan muncul. Inilah yang disebut 'true' peak – puncak asli yang dihasilkan ketika audio digital dikonversi menjadi sinyal analog untuk dimainkan di speaker.
Sebagian besar software dan hardware yang kita gunakan untuk memproduksi musik sanggup menangani true peak ini tanpa masalah, sehingga kita tidak menyadarinya. Namun, konverter digital-ke-analog pada perangkat kelas konsumen yang digunakan oleh pendengar kita terkadang tidak mampu mengatasinya sehingga memicu clipping, terutama jika inter-sample peak tersebut sering terjadi dan ekstrem.
Oleh karena itu, true peak adalah kalkulasi nilai puncak di dunia nyata, yang memungkinkan kita untuk mengantisipasinya terlebih dahulu agar tidak terjadi masalah saat lagu diputar.
True Peak Limiter
Salah satu solusi untuk mengatasi true peak adalah dengan menggunakan True Peak Limiter. Alat ini menggunakan fitur yang disebut oversampling, yang meningkatkan resolusi audio di dalam prosesornya, sehingga memungkinkannya mendeteksi true peak ini lalu membatasi sinyalnya dengan tepat.
Efek samping utama dari true peak limiting adalah ia bisa memperhalus bagian transient. Produser musik electronic dance (EDM), misalnya, sering merasa bahwa ketukan punchy dari kick dan snare mereka jadi kurang nendang akibat penggunaan true peak limiting yang berlebihan.
Pada akhirnya, perdebatan ini masih terus ramai di kalangan engineer mastering – apakah sebaiknya menggunakan true peak limiting atau cukup memantau intensitas true peak lalu menurunkan sedikit limiter digital konvensionalmu untuk meminimalkannya?
Namun selama orang-orang masih streaming dan mendengarkan musik lewat perangkat digital konsumen, relevansi true peak dalam proses mastering sama sekali tidak perlu dipertanyakan lagi.
Karena apa pun pilihan metodemu, true peak yang berlebihan itu sangat mengganggu dan bahkan bisa membuat platform streaming menyesuaikan volume musikmu secara otomatis saat diputar.
Menganalisis trek fotomu dengan Mix Check Studio akan membantumu mendeteksi jika true peak-mu terlalu tinggi, sekaligus memberikan tips praktis untuk mengatasinya.
Kata Penutup
Jadi, ternyata clipping itu ibarat tokoh antihero yang unik dalam perjalanan produksi musik kita. Selama kamu bisa bekerja sama dengannya demi tujuan yang sama, clipping bisa menambahkan karakter dan energi yang asyik, membantumu menjinakkan transient, bahkan menyelamatkan take vokal atau instrumen yang tadinya terdengar lemas!
Tapi jangan lengah sedikit pun! Jika dibiarkan liar tanpa pengawasan, ia akan merusak rekamanmu, menyedotmu ke dalam pusaran bass yang kacau, mengacak-acak energi ritme lagu, dan membuat hasil master-mu terdengar kotor.
Tapi tenang saja! Sekarang kamu sudah tahu rahasia kelemahan clipping, senjata utama yang bisa kamu gunakan setiap kali ia mulai nakal atau menyelinap ke tempat-tempat yang tidak diinginkan.
Tetap waspada, pantau terus level suaramu, dan bersahabatlah dengan headroom!
Sekarang setelah kamu paham soal clipping dan headroom, yuk lanjut baca artikel seru kami lainnya tentang dinamika - segera hadir dan kenyaringan (loudness)!
Untuk perusahaan & pengembang
Pelajari